Monday, December 5, 2011
Create a Profile
In this activity, we (each group) were given a set of three to five clues, and had to create a profile, or possible story, for the crime based on the evidence.The evidence provided ranged from a variety of different prints to hairs and fibers to a torn up letter. For my group, we were assigned the 3rd set of clues. This contained two fingerprints(one identified, one unidentified), a small footprint,. hair and a torn letter. We used then concluded these evidences into a story.
In Class Activity: Crime Scene Analysis
In this activity, we (each group) was assigned a miniature crime scene. My group was assigned crime scene #1, where there were 11 evidences, and the body was found at the edge of a wooded area, near a small pond.
Evidence 1: torn leter
Evidence 2: Hair
Evidence 3: Fingerprint
Evidence 4: Possible poison
Evidence 5: Maggots
Evidence 6: Decaying face
Evidence 7: Footprint walking away from crime scene & victim's fooprint
Evidence 8: Fingerprint needed to be lifted off of glass
Evidence 9: Additional fingerprint
Evidence 10: Possible fiber
Evidence 11: Syringe
For the first clue, once the letter was reconstructed, we found it was a (possibly forged) suicide note. The cursive flowed with small gaps between the words,. did not have a slant, the words were directly on top of the line, the writer applied a great amount of pen pressure, letters such as the lowercase 'l' had big loops, and the dot for the 'i' was placed over the next letter.
For the next clue, through microscopic analysis, we proved the hair as Caucasian.
Next, clue #3, the fingerprint was identified as a plain arch.
Clue #4 was not any poison or drug we know how to identify, so it remained unidentified.
Clue #5 and #6 proved that the body was in the Active decay stage, which is then sub-categorized as Butyric fermentation, which is 20 to 50 days after death and/or disposal.
For the seventh clue, the victim footprint had a height of 6 7/8", width of 4" and looked like an athletic shoe of a child. The suspect's footprint height was 11", width 4", and it was an athletic shoe.
Next, the 8th clue was a fingerprint needing to be lifted. We successfully lifted it to find it was an ulnar loop.
Continuing, the 9th clue, the additional fingerprint, was proved to be a double loop.
The unknown fabric, clue #10, was nylon. we proved this with microscopic analysis.
Lastly, clue #11 was the syringe, most likely used to poison the victim with the unknown poison.
Lucas Moore got into a heated argument with his wife about their child and stormed out of their house. His wife filed for divorce, which drove Lucas into insanity. He was instituted to a mental asylum, where he built up anger over his child, which he blamed for the divorce. He escaped after a year of captivity, and planning how to kill his child. He located the residence of his ex-wife and child and left the forged note on the kitchen table. He later stalked his child down, who was on his way to school, taking a short-cut through the woods. Lucas tried to poison his child, but his son fought back, not recognizing his child after his year in the asylum. Lucas accidentally killed his son before he had planned to, so he fled the scene.
Evidence 1: torn leter
Evidence 2: Hair
Evidence 3: Fingerprint
Evidence 4: Possible poison
Evidence 5: Maggots
Evidence 6: Decaying face
Evidence 7: Footprint walking away from crime scene & victim's fooprint
Evidence 8: Fingerprint needed to be lifted off of glass
Evidence 9: Additional fingerprint
Evidence 10: Possible fiber
Evidence 11: Syringe
For the first clue, once the letter was reconstructed, we found it was a (possibly forged) suicide note. The cursive flowed with small gaps between the words,. did not have a slant, the words were directly on top of the line, the writer applied a great amount of pen pressure, letters such as the lowercase 'l' had big loops, and the dot for the 'i' was placed over the next letter.
For the next clue, through microscopic analysis, we proved the hair as Caucasian.
Next, clue #3, the fingerprint was identified as a plain arch.
Clue #4 was not any poison or drug we know how to identify, so it remained unidentified.
Clue #5 and #6 proved that the body was in the Active decay stage, which is then sub-categorized as Butyric fermentation, which is 20 to 50 days after death and/or disposal.
For the seventh clue, the victim footprint had a height of 6 7/8", width of 4" and looked like an athletic shoe of a child. The suspect's footprint height was 11", width 4", and it was an athletic shoe.
Next, the 8th clue was a fingerprint needing to be lifted. We successfully lifted it to find it was an ulnar loop.
Continuing, the 9th clue, the additional fingerprint, was proved to be a double loop.
The unknown fabric, clue #10, was nylon. we proved this with microscopic analysis.
Lastly, clue #11 was the syringe, most likely used to poison the victim with the unknown poison.
Crime Story:
Lucas Moore got into a heated argument with his wife about their child and stormed out of their house. His wife filed for divorce, which drove Lucas into insanity. He was instituted to a mental asylum, where he built up anger over his child, which he blamed for the divorce. He escaped after a year of captivity, and planning how to kill his child. He located the residence of his ex-wife and child and left the forged note on the kitchen table. He later stalked his child down, who was on his way to school, taking a short-cut through the woods. Lucas tried to poison his child, but his son fought back, not recognizing his child after his year in the asylum. Lucas accidentally killed his son before he had planned to, so he fled the scene.
In Class Activity: Witness Experiment
In class, each group was given a stack of magazines and we had to cut faces of about the same size out of them. Then, we cut out the major facial features, such as forehead, hair, nose, eyes, cheeks, mouth and chin.In our group, me mixed each others features together into their corresponding piles. After this, we then tried to recreate each person's cut-out, based on memorization.once we got the correct face, we repeated the process for another person's cut-out. This activity helped us realize how important a witnesses memorization is when it comes to finding the suspect.
Sunday, December 4, 2011
In Class Activity: Poison Analysis
For this activity, different stations were set up that contained a variety of possible poisons. At each station, there were three different samples of potential poisons that we (our group) had to identify by using various methods such as pH testing and reagent testing. Ammonia, aspirin, cyanide, iodine, and metal poison are some of the various poisons that we were able to identify in the lab. We were also able to use the methods learned in our lab in the crime scene activity done in a later class.
In Class Activity: Lipstick
In this activity, all(including the boys) of the students were required to put on lipstick, leave our lip print on an index card, and examine the properties of lips.During examination, we recorded different properties that were visible on our lips. Then later we (our individual group) allowed another group to compare our lip prints to their prints on their index cards and matched them together. This lab exemplified the use of looking at the characteristics of things left behind at a crime scene (such as lip prints), observing them and then recording them in order to find the possible suspects.
In Class Activity: Drug Analysis
For this lab, we were given various simulated drug sample that resembled real drugs and were required to properly identify and label them according to the test. First, we were given “drugs” and was told to dilute them to the point where the substance was mostly dissolved in the mixture. Then we took a small sample of the dilute, tested it with pH paper, and recorded the pH and the color that it displayed. Then we used both LSD and Cocaine reagent that would display a color if the substance was positive for the reagent. For example, the Cocaine reagent would turn blue if the mixture was positive for "Cocaine" and would remain colorless if it was negative. With the LSD, the mixture would turn yellow if the presences of "LSD" were apparent. Out of the six tested substances, three were positive of "Cocaine", two were positive for "LSD" and the last one did not contain either. This lab provided us with the knowledge needed to understand how to test and verify substances as being positive or negative for drugs.
In the picture, the given dilute is positive for "Cocaine", so the indicator turned blue:

In the picture, the given dilute is positive for "Cocaine", so the indicator turned blue:

In Class Activity: Footprinting
In this activity, we left a footprint in a tub of soil provided and observed the characteristics of our impression. Almost like real forensic analysts, we recorded crime scene data such as weather information, time, date, location, and direction of the footprint. Then we also recorded properties of the print such as the length and width of the shoe impression, as well as any visible characteristics such as the ridges or flatness. We were soon able to determine the gender and size of the person leaving the print due to the depth of the imprint. For example, males generally leave a deeper print because of their size and have a larger print because they usually have larger feet than women. Also, men and women tend to wear different shoes, for instance, some men wear boots and some women wear heels.With this lab we were able to visualize and apply the techniques used by real crime scene investigators in recording and narrowing the possible suspects by foot impressions that they could have left at a crime scene.

History of Handwriting Analysis
Prospero Aldorisio's 1611 manuscript is probably the first book to describe how to analyze handwriting. The major contender is Camilo Baldi's manuscript which was unofficially published in 1622. The 1625 edition was probably the first authorized edition of Baldi's book.
 Around 1830 Abba Michon became interested in handwriting analysis. He published his findings shortly after founding Sociate Graphologique in 1871. The most prominent of his disciples was J. Crapieux-Jamin who rapidly published a series of books that were soon published in other languages. Starting from Michon's integrative approach, Crapieux-Jamin ended up with a holistic approach to graphology.

After World War I, interest in graphology continued to spread in Europe as well as the United States. In Germany during the 1920s, Ludwig Klages founded and published his finding in Zeitschrift fur Menschenkunde (Journal for the Study of Mankind). His major contribution to the field can be found in Handschrift und Charakter.
In 1929 Milton Bunker founded The American Grapho Analysis Society teaching Graphoanalysis. This organization and its system split the American graphology world in two. Students had to choose between Graphoanalysis or Holistic Graphology. Whilst hard data is lacking, anecdotal evidence indicates that 10% of the members of International Graphoanalysis Society(IGAS) were expelled between 1970 and 1980 [36]. By the time Peter Ferrera died in 1991, the decimation of IGAS members had resulted in a decline of the influence of Graphoanalysis, and IGAS on American graphology.

In 1972 talks between the American Handwriting Analysis Foundation and the American Association of Handwriting Analysis started, with the aim to form a single organization. Those talks resulted in the creation of the Council of Graphological Societies in 1976.


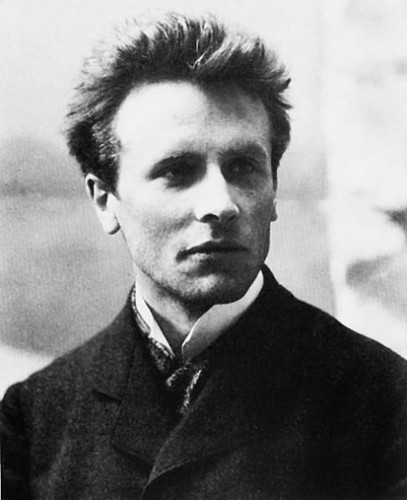
J. Crapieux-Jamin
Alfred Binet was convinced to do research into graphology from 1893 to 1907. He ended up calling it "The science of the future", despite graphologists' rejecting the results of his research.After World War I, interest in graphology continued to spread in Europe as well as the United States. In Germany during the 1920s, Ludwig Klages founded and published his finding in Zeitschrift fur Menschenkunde (Journal for the Study of Mankind). His major contribution to the field can be found in Handschrift und Charakter.
Ludwig Klages
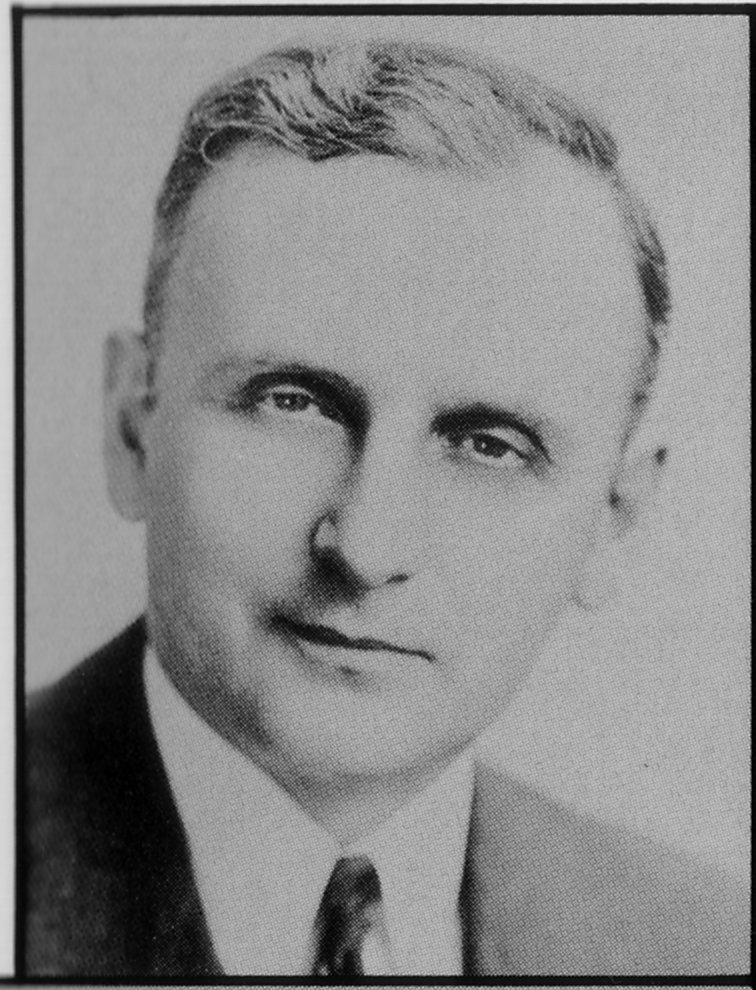
Thea Stein Lewinson and J. Zubin modified Klage's ideas, based upon their experience working for the U.S. Government, publishing their method in 1942. In 1929 Milton Bunker founded The American Grapho Analysis Society teaching Graphoanalysis. This organization and its system split the American graphology world in two. Students had to choose between Graphoanalysis or Holistic Graphology. Whilst hard data is lacking, anecdotal evidence indicates that 10% of the members of International Graphoanalysis Society(IGAS) were expelled between 1970 and 1980 [36]. By the time Peter Ferrera died in 1991, the decimation of IGAS members had resulted in a decline of the influence of Graphoanalysis, and IGAS on American graphology.
Milton Bunker
Klara G. Roman was the most prominent of the German refugee scholars. Her books are still considered to be foundations for contemporary American Holistic graphology. She taught at the New School for Social Research in New York, and was succeeded there by Daniel S. Anthony and Florence Anthony. Klara G. Roman's book on handwriting
Handwriting Workshops Unlimited was organized by Charlie Cole as a series of lectures for advanced students of Graphoanalysis. These lectures featured holistic graphologists such as Thea Lewinson and Klara Roman. By 1960 all of the participants had been expelled by IGAS. These individuals went on to form the American Handwriting Analysis Foundation. Later mass expulsions of IGAS members led to the formation of other societies, such as the American Association of Handwriting Analysts that were orientated towards Holistic graphology.In 1972 talks between the American Handwriting Analysis Foundation and the American Association of Handwriting Analysis started, with the aim to form a single organization. Those talks resulted in the creation of the Council of Graphological Societies in 1976.
Logo of the Council of Graphological Societies
Since the rise of the Internet in the early 1990s, the graphology organizations have suffered major declines in membership. However, due to email lists, communication between graphologists representing different approaches has increased.
Twelve Basics Characteristics of Handwriting
Experts usually examine the following characteristics when examing handwriting samples:
1. Line quality: Do the letters flow or are they written with very intent strokes?
2. Spacing of words and letters: What is the average space between words and letters?
3. Ratio of height, width, and size of letters: Are the letters consistent in height, width, and size?
4. Lifting pen: Does the author lift his or her pen to stop writing a word and start a new word?
5. Connecting strokes: How are capital letters connected to lower-case letters?
6. Strokes to begin and end: Where does the letter begin and end on a page?
7. Unusual letter formation: Are any letters written with unusual slants or angles? Are some letters printed rather than written in cursive?
8. Pen pressure: How much pen pressure is applied on upward and downward strokes?
9. Slant: Do letters slant to the left or right? If slant is pronounced, a protractor may be used to determine the deegree of slant.
10. Baseline habitys: Does the author write on the line or does the writing go above or below the line?
11. Fancy writing habits: Are there any unusual curls or loops or unique styles?
12. Placement of diacritics: How does the author cross the t's or dot the i's?
Hand Writing Template
In handwriting forgery, there are two ways of forging someone's handwriting: free handing and tracing. With free handing, the forger spends time learning and practicing the signature. They begin to develop the signature and soon their replication becomes very similar if not exactly the same signature that they are trying reproduce. However, the other method, tracing, involves less learning and/or skill because the forger is just merely writing over the original print. Unlike the learning aspect of free handing, tracing is an inaccurate method due to untraceable handwriting characteristics such as line quality, words spacing, and slant that have more noticeable differences because of the forger’s persistence on recreating the exact same signature or writing. With free hand, the forger has learned and practiced the signature and its second nature to them. Overall, free handing is a better method of forgery than tracing due to the learning process, time, and dedication involved with free handing.
Check Forgery Activity
One of the forensics activities done in class was an lab involving handwriting. Blank checks were printed for each student to fill out and sign under their alias. Each person was to fill out the check as if they normally would, then rip the checks into pieces, and place them separately into an envelope provided. The envelopes were given anonymously between each member and the checks were reconstructed. The handwriting on the checks identified the group member who wrote the check by comparing the known characteristics over each member to the characteristics seen on each check. Characteristics such as slant, spacing of words, and connecting strokes were all factors in indentifying the group member who created the check.

Famous Forgery Case
Early in 1972 a Federal Grand Jury heard the testimony of a Questioned Document Examiner from the Crime Laboratory of the U.S. Postal Inspection Service regarding questioned documents allegedly written by Howard R. Hughes. In these documents permission was granted for a biography of Mr. Hughes to be written by Clifford Irving. Mr. Irving had used these questioned documents to convince the editors of McGraw-Hill Book Co. and Life Magazine that he had a deal with Mr. Hughes - an allegation hotly contested by Howard Hughes when he learned of it.

Monday, November 28, 2011

Sunday, November 27, 2011
Picture and Labeled Parts of a Complete Hair
Under a 3D microscope, this is what a hair would look like if you were able to label each part:

Major Types of Fibers (Not Hairs)
There are two types of fibers: synthetic (man-made) and natural (from plants/ naturally made)
Some synthetic fibers are:


Acetate
Some natural fibers are:


These are all used for a variety of things, such as making wigs, ropes, clothing, and even bulletproof vests.
Some synthetic fibers are:
Polyester
Nylon
Acrylic
Kevlar
Acetate
Bamboo
Spider silk
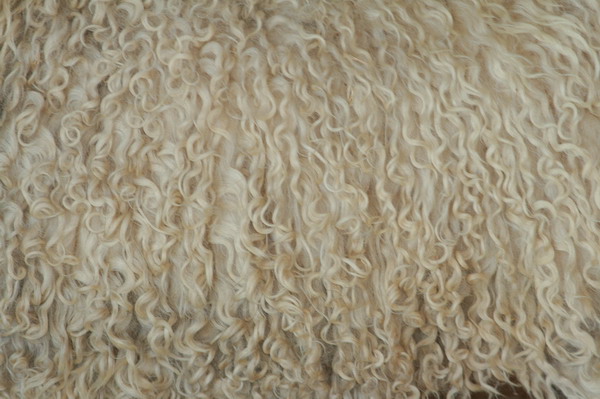
Animal hairs made into fibers (Wool, Angora, etc)
Flax
Cotton
These are all used for a variety of things, such as making wigs, ropes, clothing, and even bulletproof vests.
Hair/Fiber Collection Techniques
A crime scene investigator (CSI) may use combs, tweezers, containers and a filtered vacuum device to collect any hair or fibers at the scene. In a rape case with a live victim, the CSI accompanies the victim to the hospital to obtain any hairs or fibers found on the victim's body during the medical examination. The CSI seals any hair or fiber evidence in separate containers for transport to the lab.If the person at the crime scene is already dead, the CSI only collects fibers that would not alter the process of determining the cause of death.

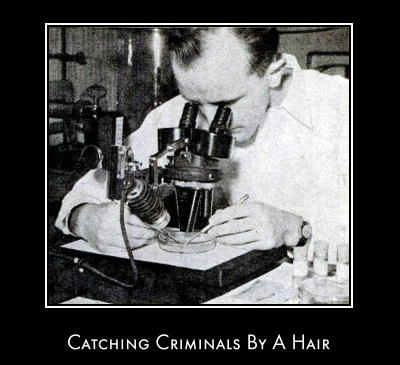
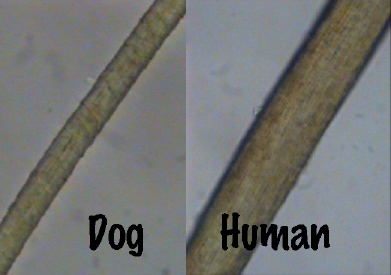
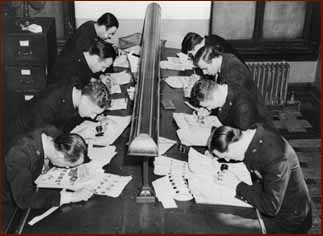
Typical Hair/Fiber Analysis
Scientist analyze hair and fibers by looking at them under a microscope. After the hair or fiber is positioned correctly under the microscope, the scientist compares it to a range of other hairs or fibers that are possibilities of being an exact match, most of the time collected from the crime scene or the suspect's property. Once they find an exact match, they try to make a connection between the analysis and the crime scene, or in other words, to see if it is useful the proving the suspect guilty.
Reliability of Hair/fiber crime scene data
In most cases, where tissue is left on the hair, hair/fiber analysis is 100% accurate, due to scientist being able to extract DNA from the tissue to create an exact match. When there is no left over tissue present though, the list of possible people who could have shed the hair is very drastically narrowed. It is narrowed by the scientist being able to pinpoint the hair to certain races or types, such as black people hair, Caucasian hair, color-treated hair, Asian hair, a specific animal hair, or synthetic hairs, such as cotton, nylon, polyester, or wool. Also, if they find that the hair sample is complete, as in it was not cut, tore, or tampered in anyway, they can use the hair length to even shorten the list of possibilities, because a man with a shaved head is not going to have the same hair length of a woman with hair down to her waist.
Friday, November 25, 2011
Famous Case where Hair/Fiber Analysis was used
One famous case that was solved using hair/fiber analysis was that against Dr. Jeffrey MacDonald, Army captain and Green Beret, who in 1970 was accused of murdering his two children and pregnant wife. He claimed that armed men came into his house and killed them, and then attacked him, but he was able to fend them off. Investigators proved this testimony a lie when the blue fiber that created Dr. MacDonald's clothes were found inside of some of his wounds, which led investigators to imply they were self-inflicted. Also, the same fibers were found under the body of his dead wife, in the room in which his children were killed, and the blue fibers were found under a fingernail of his murdered daughter.

Tuesday, November 22, 2011
History of Fingerprinting
Fingerprinting is the science of taking imprints of a person's fingers for the purpose of establishing personal identification. Forensic science has proven that the probability of two people having the same exact fingerprints is impossible, and it has been concluded that fingerprinting is a undeniable way of identification.

It's difficult for historians to point to the one time as the first instance of the fingerprinting process. There is proven evidence of the use of fingerprinting in ancient civilizations, most notably during the building of the pyramids in Egypt around 2000 B.C. Also, it is proven during the 3rd Century B.C. that the Chinese utilized fingerprints as a testament on official documents and used in court litigation proceedings. However, William J. Herschel, who is known as the first person to implement the practical application of fingerprinting, took issue with the Chinese employment of the fingerprinting process because he felt that they used fingerprinting as part of a spiritual practice, not as a systematic identification of individuals. He also believed that the prints were fingermarks, not fingerprints. Lastly, in Persia around 1350, government papers appeared to be fingerprinted to make them official documents, but there were no confirmations of the documented use of fingerprints for identification purposes during this time.

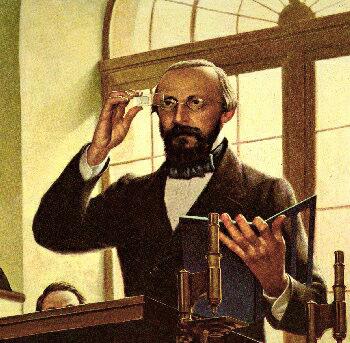
William James Herschel
Back to the aforementioned Herschel who, in 1858, was an English administrator assigned to the jurisdiction of Hooghly near Calcutta, India. Herschel was concerned about the residents of Hooghly getting their pensions, and he was concerned about establishing veracity in court regarding business dealings with the Government. So, in 1858, he made a construction builder, by the name of Rajyadhar Konai, put a print of his palm and fingers on an official business transaction form since Mr. Konai could not write. As far as historians and others alike know, this became the first documented application of fingerprints. Herschel also had jurisdiction over the jails, so he systematically fingerprinted the inmates and kept records of all fingerprints on file.
Next, history continued with a Scottish doctor named Henry Faulds who was a contemporary of Herschel, although a sworn enemy, as both men tried to mark their place in history by claiming they each were the "Father of Fingerprinting." Faulds' vast works were impressive and valuable to the science of fingerprinting for his time. While working in a hospital in Tokyo, Japan, in 1874, Faulds recorded fingerprints and concluded that fingerprint patterns could not change and they could be lifted by having ink applied to the print, then having a surface such as paper lift it and create a recordable version.. Faulds was also able to lift a fingerprint from a bottle of whiskey, and thus received credit for the first identification of a fingerprint.

Henry Faulds
The first evidence of the use of fingerprints in the United States was by a surveyor in New Mexico by the name of Gilbert Thompson who, in 1882, put his own prints on a survey to prevent forgery. The first recorded use of fingerprint identification in a criminal matter dates back to 1892 when an Argentinean Police Commodore by the name of Juan Vucetich took prints off a door post to nail a murderer. The use of fingerprint identification as a means of solving criminal cases advanced quickly as both Scotland Yard and the U.S.A. implemented the use of fingerprints by the turn of the 20th Century.
Gilbert Thompson
The use of fingerprinting became standard operating procedure in the United States and, in 1924, Congress endowed the Federal Bureau of Investigation (F.B.I.) with the authority to establish an Identification Division. This centralized all fingerprinting files and made it much easier to identify repeat criminals and missing persons. Today the F.B.I. uses a computerized system to contain the fingerprints of some 34 million criminals. This is especially helpful because the recidivism rates are extremely high, except in those crimes of passion, such as manslaughter which generally is a non-repetitive crime.
Types of Fingerprints
First, patent prints, also called direct prints, are visible prints that occur when a foreign substance on the skin of a finger comes in contact with the smooth surface of another object. These prints leave a distinct ridge impression that is visible with the naked eye without technological enhancement of any kind. The tried and true "blood on his hands" evidence is an example of patent prints recovered from a crime scene or scene of interest to investigators. These foreign substances contain dust particles which adhere to the ridges of the fingers and are easily identifiable when left on an object.


Patent Fingerprint
Next, plastic prints are visible, impressed prints that occur when a finger touches a soft, malleable surface resulting in an indentation. Some surfaces that may contain this type of fingerprint are those that are freshly painted or coated, or those that contain wax, gum, blood or any other substance that will soften when hand held and then retain the finger ridge impressions. These prints require no enhancement in order to be viewed, because they are impressed onto an object and are easily observable.

Comparing a plastic fingerprint (in clay) to another fingerprint.
Continuing, latent prints are fingerprint impressions secreted in a surface or an object and are usually invisible to the naked eye. These prints are the result of perspiration which is derived from sweat pores found in the ridges of fingers. When fingers touch other body parts, moisture, oil and grease adhere to the ridges so that when the fingers touch an object, such as a lamp, a film of these substances may be transferred to that object. The impression left on the object leaves a distinct outline of the ridges of that finger. These fingerprints must be enhanced upon collection and, because they serve as a means of identifying the source of the print, they have proven to be extremely valuable over the years in the identification of its source.
Prints found on a bottle with the help of a dark powder
Lastly, exemplar prints, or known prints, is the name given to fingerprints deliberately collected from a subject, whether for purposes of enrollment in a system or when under arrest for a suspected criminal offense. During criminal arrests, a set of exemplar prints will normally include one print taken from each finger that has been rolled from one edge of the nail to the other, plain (or slap) impressions of each of the four fingers of each hand, and plain impressions of each thumb. Exemplar prints can be collected using Live Scan or by using ink on paper cards.

A sample of a fingerprint identification card by the FBI
Sunday, November 20, 2011
Basic Shapes of Fingerprints
1. Arch
In arches, the ridges of the finger run continuous from one side of the finger to the other with no curving. There are two sub-groups that further define the arch pattern:
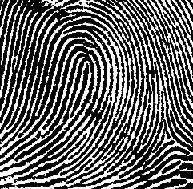
Plain Arch - this pattern has a consistency of flow to it. It starts on one side of the finger, and then the ridge cascades upward slightly, almost resembling a wave out on the ocean. The plain arch then continues its journey along the finger to the other side. The plain arch is the simplest of the fingerprint patterns to discern.
Tented Arch - this pattern is similar to the plain arch in that it starts on one side of the finger and flows out in a similar pattern to the other side. However, the difference in the tented arch lies in the ridges in the center, which are not continuous as in the case of the plain arch. The ridges, which adjoin each other in the center, converge and thrust upward, giving the impression of a pitched tent.

In loops, the ridges make a backward turn but do not twist. This backward turn, or loop, is differentiated by how the loop flows on the hand and not how it flows on the card on which the imprint is taken. The imprint on the fingerprint card is similar to the reverse image we see when we look in the mirror at ourselves. There are two sub-groups that were identified in this category:
Radial Loop - these are loops that flow toward the radius bone of the hand or, in other words, when the downward slope of the loop is from the direction of the little finger toward the thumb of the hand.
Ulnar Loop - these are loops that flow toward the ulna bone of the hand or, in other words, when the downward slope of the loop is from the direction of the thumb toward the little finger of the hand.
In whorls, there are patterns in which there are two or more deltas (first ridge nearest the divergence point of two type lines) and there exists a recurve preceding each delta. There are four sub-groups of whorls:
Plain Whorl - in these whorls, the ridges make a turn of one complete circuit and, therefore, are circular or spiral in shape. The plain whorl is the simplest form of whorl and the most common. There are at least two deltas and a ridge whose circuit may be spiral, oval or circular in shape.


In arches, the ridges of the finger run continuous from one side of the finger to the other with no curving. There are two sub-groups that further define the arch pattern:
Plain Arch - this pattern has a consistency of flow to it. It starts on one side of the finger, and then the ridge cascades upward slightly, almost resembling a wave out on the ocean. The plain arch then continues its journey along the finger to the other side. The plain arch is the simplest of the fingerprint patterns to discern.
Tented Arch - this pattern is similar to the plain arch in that it starts on one side of the finger and flows out in a similar pattern to the other side. However, the difference in the tented arch lies in the ridges in the center, which are not continuous as in the case of the plain arch. The ridges, which adjoin each other in the center, converge and thrust upward, giving the impression of a pitched tent.
Tented Arch
2. LoopIn loops, the ridges make a backward turn but do not twist. This backward turn, or loop, is differentiated by how the loop flows on the hand and not how it flows on the card on which the imprint is taken. The imprint on the fingerprint card is similar to the reverse image we see when we look in the mirror at ourselves. There are two sub-groups that were identified in this category:
Radial Loop - these are loops that flow toward the radius bone of the hand or, in other words, when the downward slope of the loop is from the direction of the little finger toward the thumb of the hand.
Ulnar Loop - these are loops that flow toward the ulna bone of the hand or, in other words, when the downward slope of the loop is from the direction of the thumb toward the little finger of the hand.
Ulnar Loop
3. WhorlsIn whorls, there are patterns in which there are two or more deltas (first ridge nearest the divergence point of two type lines) and there exists a recurve preceding each delta. There are four sub-groups of whorls:
Plain Whorl - in these whorls, the ridges make a turn of one complete circuit and, therefore, are circular or spiral in shape. The plain whorl is the simplest form of whorl and the most common. There are at least two deltas and a ridge whose circuit may be spiral, oval or circular in shape.
Central Pocket - in these whorls, one or more of the simple recurves of the plain whorl curves a second time.
Double Loop - in these whorls, there are two separate loop formations. In each of these formations, there are two entirely separate and distinct sets of shoulders and deltas.
Accidental Whorl - in these whorls, the composition of the pattern is derived from two distinct types of patterns with at least two deltas. Whorls which contain ridges matching the characteristics of a particular whorl sub-grouping are classified as accidental whorls.
Plain Whorl
4. Composites
In composites, there are patterns found in fingerprints which are combinations of arch, loop and whorl. Henry J. Herschel subdivided the composites into four sub-groups:
Central Pocket Loop - these loops curve a second time forming a pocket within the loop.
Twinned Loop - also referred to as the Double Loop, these loops consist of two separate loop formations.
Lateral Pockets Loop - these loops are similar to the Twinned Loop except that their ridges bend sharply down on one side before recurving, actually forming a pocket. The F.B.I. finds it too difficult to locate these two loops, and classifies both kinds as Double Loops.
Accidental Loops - these loops are a combination of any two types of pattern with the exception on the plain arch that basically has no pattern.
Accidental loops
Techniques Used to Develop Fingerprints and Procedure for Collecting Them
Fingerprints can be left on two contrasting surfaces: Non-Porous and Porous
Non- Porous
Prints are easily left on non-porous surfaces such as glass, wood, and painted areas. In order to recover those prints, the method of dusting is normally required.

An investigator dusting a wooden door, a non-porous surface, to find fingerprints.
Dusting is a common method to find fingerprints on non-porous surfaces. It starts by the area where the print is located is lightly dusted with a dusting brush and the corresponding colored powder, which depends on the background shade/coloring. Then the dust is lifted with tape and set against a contrasting background to make the print easily visible.
Black Dust: White or Light colored Surfaces
Grey or White Dust: Dark Surfaces
Fluorescent Dust: Multi-Colored Surfaces
Magnetic Dust: Leather or Rough Surfaces
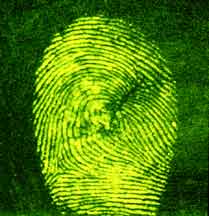
Fingerprint found using fluorescent powder.
Porous
Prints left on fiber-like surfaces such as paper and cloth are called porous. In order to recover these prints, the use of chemicals is necessary. The various chemical methods for recovering fingerprints are Iodine Fuming, Ninhydrin, Silver Nitrate, and Super Glue Fuming.
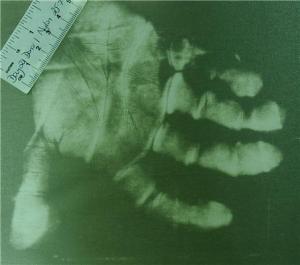
Hand print found on clothing, a porous surface.
Iodine Fuming—The material that needs to be fingerprinted is placed into an enclosed cabinet along with iodine crystals. The crystals are heated and soon turn into a gaseous vapor. The vapor then causes the prints to appear.
Ninhydrin- This method starts by spraying the chemical onto the surface of the material via an aerosol can. After a few hours, the prints begin to become visual. This process can be accelerated if the prints are heated up after application of the chemical.
Silver Nitrate- Mostly used as a last resort method when both Iodine Fuming and Silver Nitrate have failed. The silver nitrate is sprayed onto the surface of the porous material and is then left to dry. It is later exposed to ultraviolet light, which exposes the prints and allows examination.
Super Glue Fuming (also used on non-porous materials)-Super glue is placed on cotton and is treated with sodium hydroxide. The fumes are then created by heating the treated cotton.The fumes and object are placed inside a heated chamber for up to six hours and the fumes adhere to the print, exposing it.
 |
| Example of a fuming chamber |
Subscribe to:
Posts (Atom)